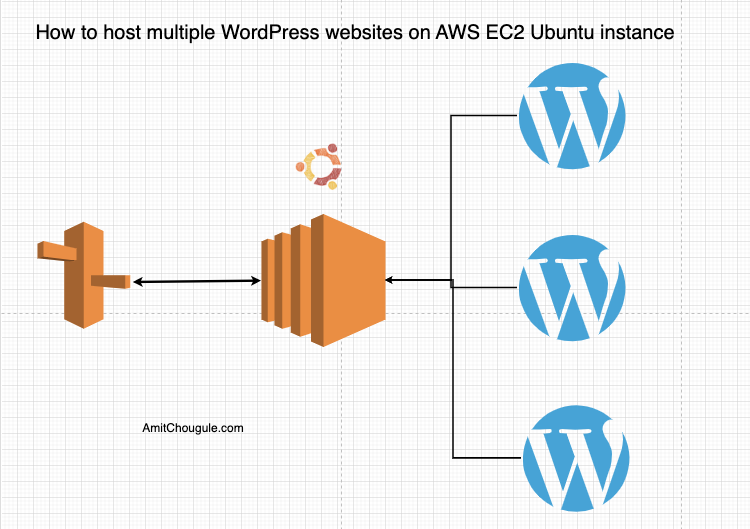
In this guide, we’ll show you how to host several WordPress websites on an AWS EC2 instance. We’ll use a free tier t2.micro instance with the Ubuntu operating system. Before we begin, make sure to create your free tier AWS account and secure it with Multi-Factor Authentication (MFA).
Create EC2 Instance
Go to All Services > EC2 and click on launch an instance. It will ask you few details to fill in as below.
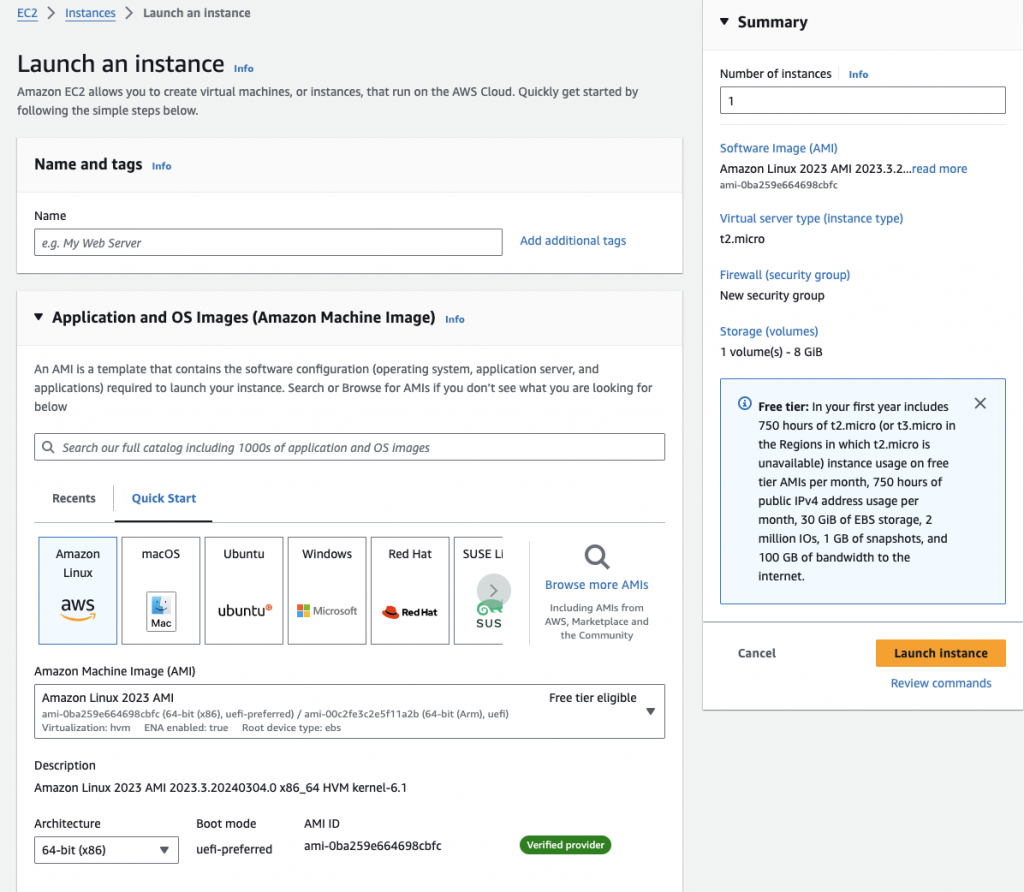
Name: give a proper name to easily identify it in future.
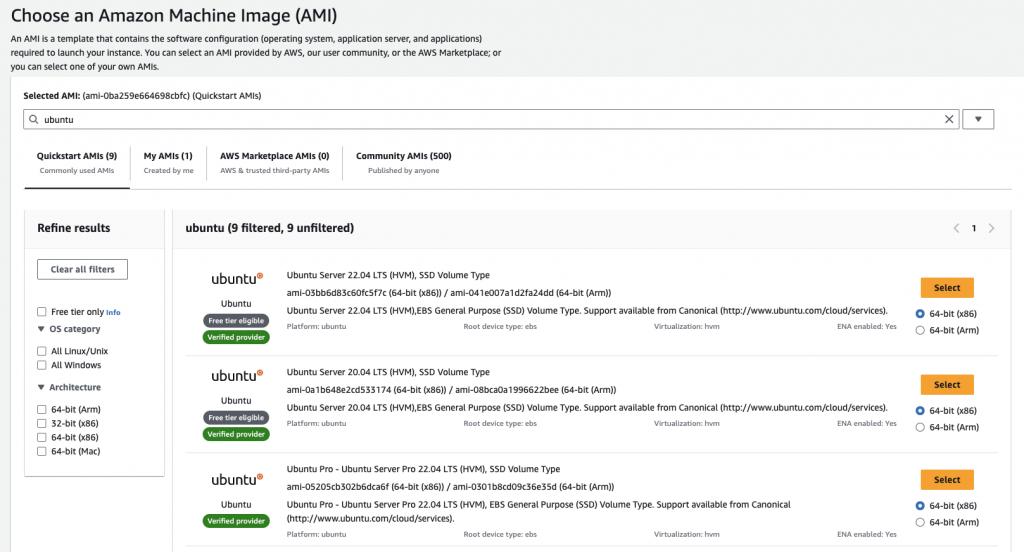
Application and OS Images (Amazon Machine Image): Here we are going to use ubuntu AMI. Select an option to browse more AMIs and search for ubuntu.
You will find Ubuntu Server 22.04 LTS (HVM), SSD Volume Type which is eligible for Free Tier. Select 64 bits.
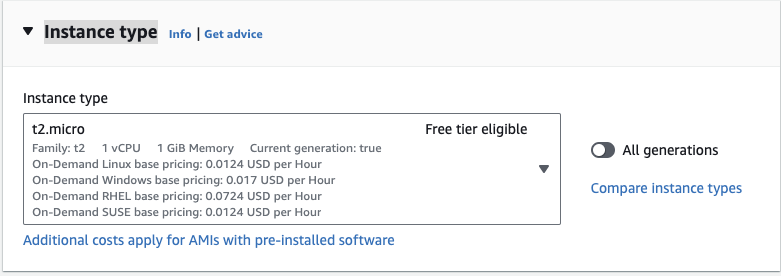
Instance type: I selected here t2.micro which is also free tier eligible.
Key pair (login): You can use if you have already created a key pair or create a new one. Make sure you save this file safely or its big hussle to get access to your EC2 instance later. If you have windows machine then you may need to use PuTTY otherwise you can choose .pem with OpenSSH.
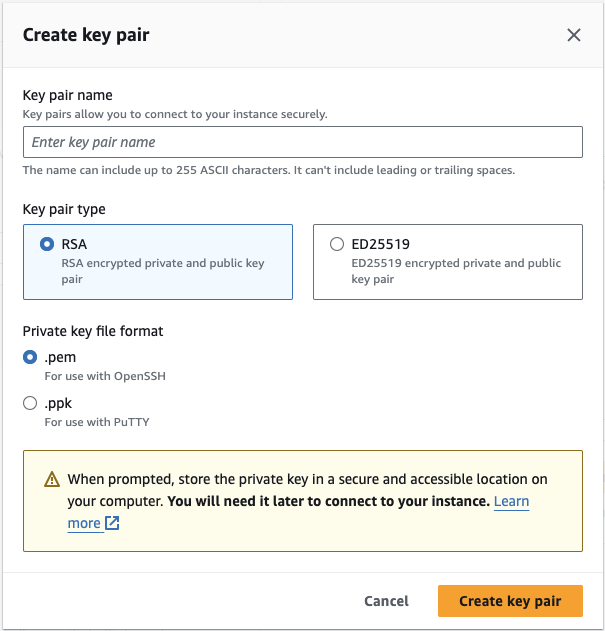
If you’re using Windows and Putty to connect to the server, you need to change a .pem file into a .ppk key using PuttyGen. You only need to do this if you’re using Windows. Open PuttyGen, load the .pem file, then click “Save Private Key” and save it as a .ppk file.
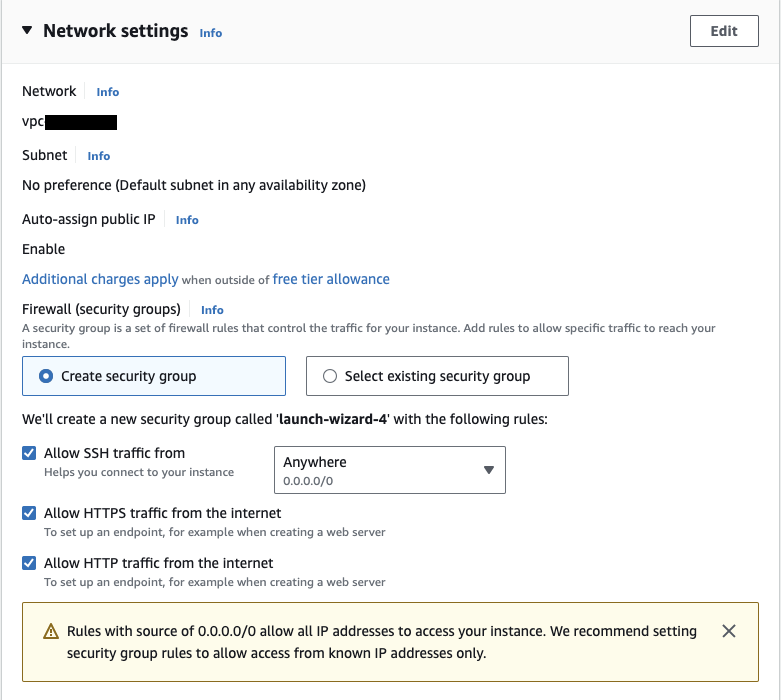
Network settings: Here you will have to define security group and other permissions. I have selected all options as I am going to host wordpress sites on this server but if you have some other application to host, choose appropriate settings.
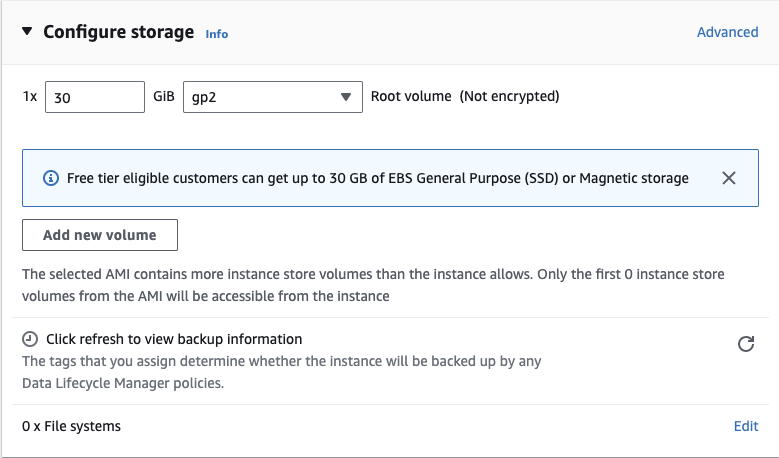
Configure storage: You can create upto 30GB of EBS SSD in Free tier
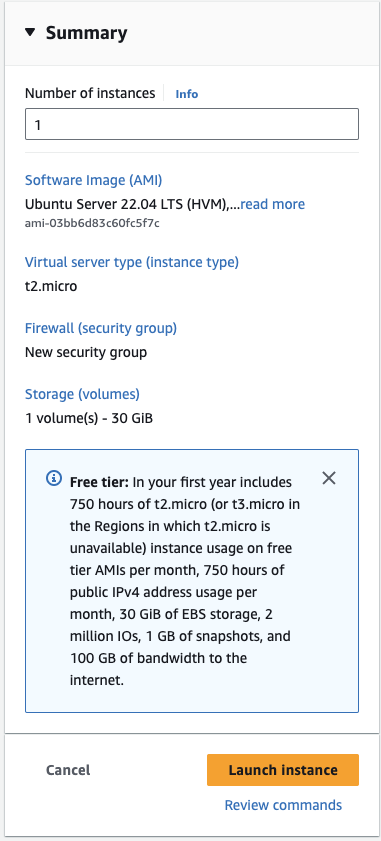
Launch Instance: Check and confirm all settings and launch instance with just one click.
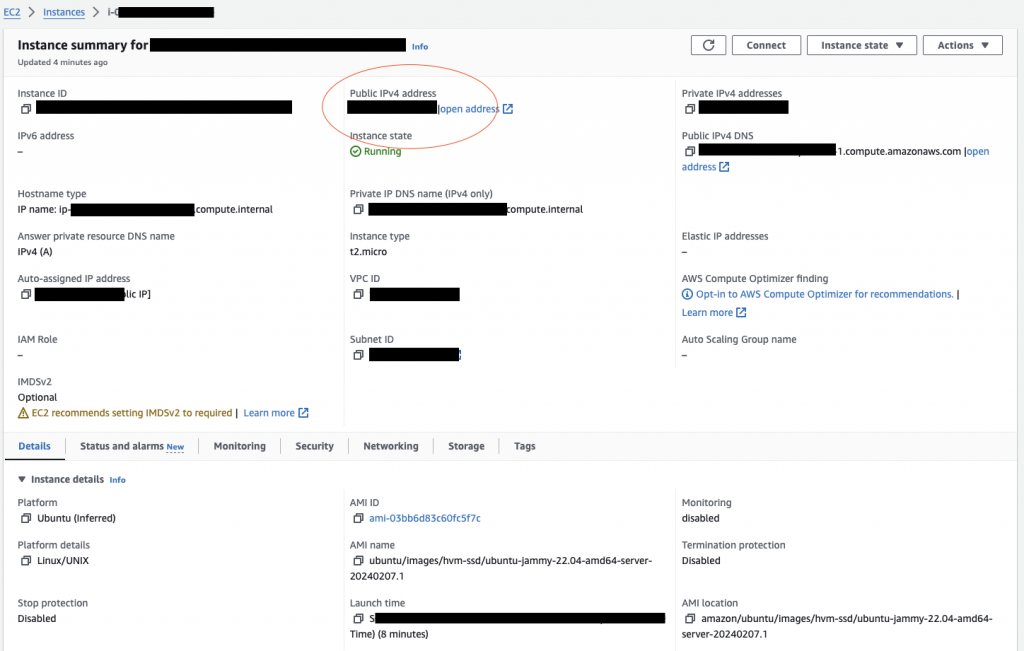
Now go to EC2 dashboard and Copy the Public IPv4 address value of the newly started instance.
Now navigate to your terminal. I am using mac. The default user for an EC2 Ubuntu instance is Ubuntu. Lets login to our server and upgrade the server by running the below commands. First navigate to folder where your private key is stored and run following command. This will prompt you to enter laptop password for one time. Then accept to continue. And voila, you will be logged into your EC2 instance.
sudo ssh -i YOUR-PRIVATE-KEY.pem ubuntu@PUBLIC-IP-ADDRESS
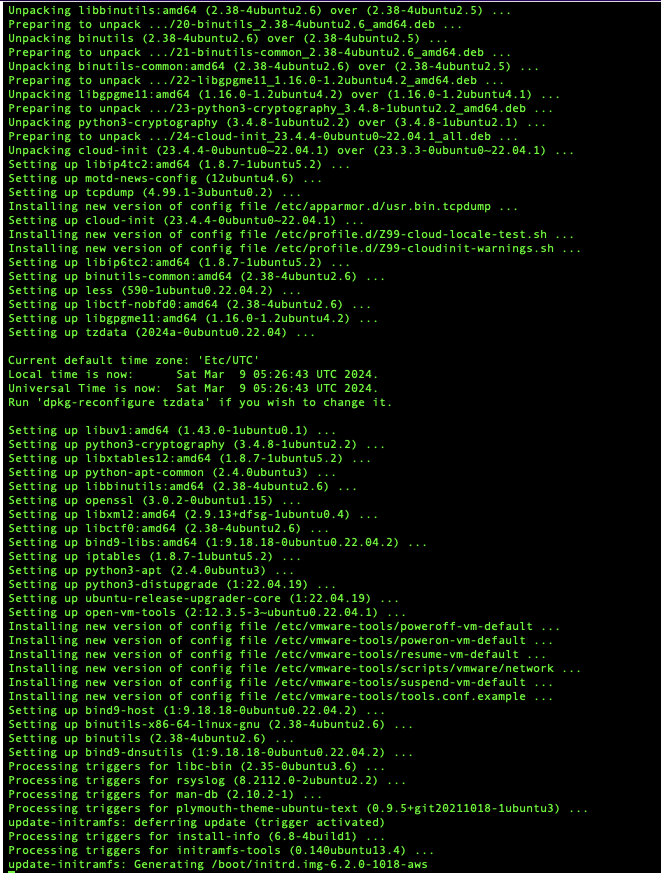
Now run following commands to update and upgrade your OS.
sudo apt-get update
sudo apt-get upgrade
This will install bunch of packages and ask sometimes for permission to proceed.
Create a new user with admin privileges:
Let’s create a new user with admin permissions. Run following commands.
sudo adduser <username>
Provide details and create the user. Add the newly created user to sudo group to give the admin permissions. Switch to that user for next steps.
sudo usermod -aG sudo <username>
su - <username>
Lets Install Apache, MySQL & PHP for wordpress
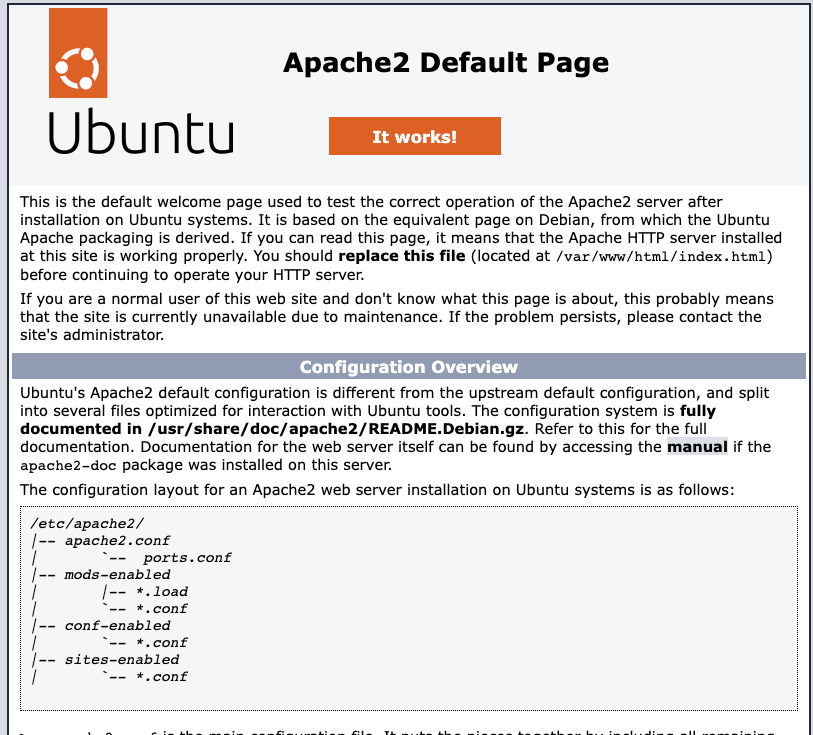
First, we will install Apache web server on the instance by running the below command.
sudo apt-get install apache2
You can visit “http://<your public ip address>” and this should display the “Apache2 Ubuntu Default Page” which can be found at “/var/www/html/index.html” on server.
Run the below command to install MySQL on the server.
sudo apt-get install mysql-server
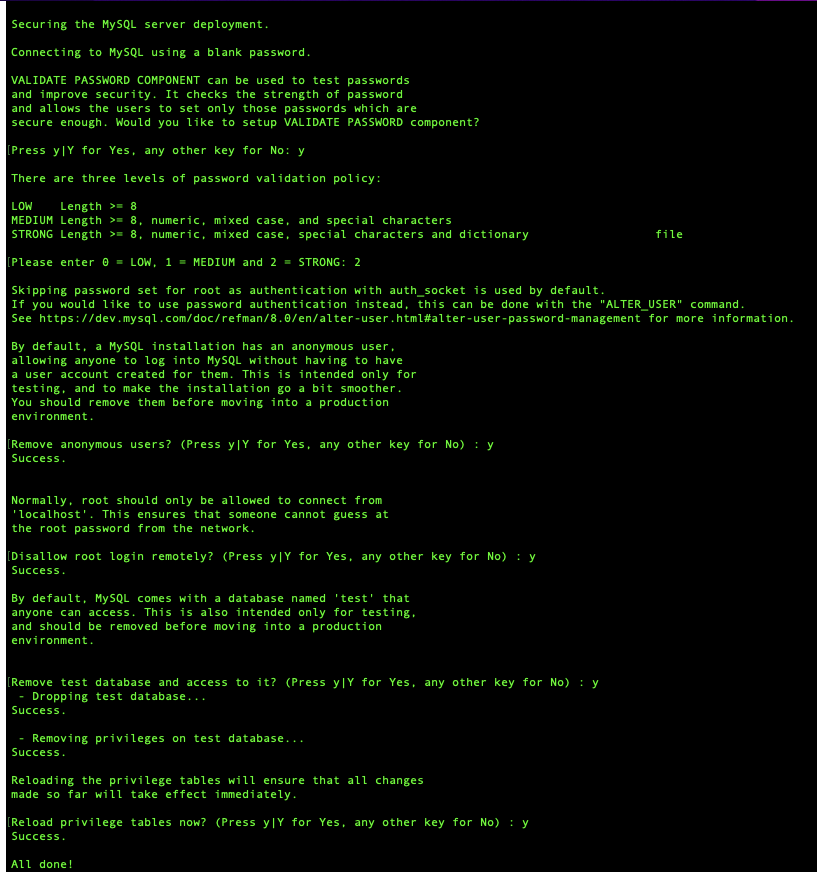
After the installation we have to make the installation secure by executing the below command.
sudo mysql_secure_installation
If you allow Validate password component, This will ask you which level of password validation that you want to apply, Do you want to remove anonymous users? Disallow root login remotely? Remove test database and access to it? Reload privileges table?
Now, We will install php & few php extensions which are needed by the WordPress to work properly.
sudo apt-get install php libapache2-mod-php php-mysql php-xml php-gd php-curl
To enable clean URLs via Wordpress permalinks, We have to enable Apache rewrite module . Run below command.
sudo a2enmod rewrite
To activate the new configuration, you need to run:
sudo systemctl restart apache2
Create a Virtual Host file for new Site
First, we need to create the folder structure which will help us to host different sites in one instance. Let’s create a folders in Apache’s www folder for 1st site
sudo mkdir -p /var/www/DOMAIN-NAME/public_html
We need to change the ownership of this folder to our new user using the below commands.
sudo chown -R $USER:$USER /var/www/DOMAIN-NAME/public_html
We have to create new Virtual Host files for our domains in the server. We will copy the default file and change it as below.
sudo cp /etc/apache2/sites-available/000-default.conf /etc/apache2/sites-available/DOMAIN-NAME.conf
You can run following command to edit newly created file
sudo vim /etc/apache2/sites-available/DOMAIN-NAME.conf
We need to add following lines to newly created file to grant the permission to overwrite the default .htaccess rules using our own .htaccess which is located at the root directory of our website and enable clean urls.
<VirtualHost *:80>
ServerAdmin webmaster@localhost
ServerName DOMAIN-NAME
ServerAlias www.DOMAIN-NAME
DocumentRoot /var/www/DOMAIN-NAME/public_html

<Directory /var/www/DOMAIN-NAME/public_html/>
Options Indexes FollowSymLinks MultiViews
AllowOverride All
Require all granted
</Directory>

</VirtualHost>
To Save and exit from vim, press ESC key and then type :wq and press enter.
Also, in order to your domain to redirect to this EC2 instance, change A record to correct IP address of EC2 in DNS manager or Route53 if you have NS hosted in AWS.
Install WordPress
To install wordpress for new site, you need to first create database user and a database.
Run following command to login as the root user to MySQL
sudo mysql -u root -p
Run following command to create a new database.
create database NAME-YOUR-DATABASE;
Run following command to create the user and grant the permissions needed as below.
CREATE USER 'USERNAME'@'localhost' IDENTIFIED BY 'PASSWORD';
GRANT ALL PRIVILEGES ON NAME-YOUR-DATABASE.* TO 'USERNAME'@'localhost';
FLUSH PRIVILEGES;
Use the exit command to exit from mysql. Login using the new user to check whether everything has worked fine as we intended.
mysql -u USERNAME -p
Run the below command to see the database we created.
show databases;
Type exit to exit from MySQL command line.
Run following command to download latest version of WordPress.
sudo wget https://wordpress.org/latest.tar.gz
Run following command to extract the files to previously created website folder at /var/www/DOMAIN-NAME/public_html/.
sudo tar -xvzf latest.tar.gz -C /var/www/DOMAIN-NAME/public_html/
As wordpress will be extracted to subfolder called /wordpress in public_html , to move all files and folders under public_html, run following command
sudo mv /var/www/DOMAIN-NAME/public_html/wordpress/* /var/www/DOMAIN-NAME/public_html/
Now, its time to enable new website.
sudo a2ensite DOMAIN-NAME.conf
Run following command to disable default ubuntu site
sudo a2dissite 000-default.conf
To activate the new configuration, you need to run:
sudo systemctl reload apache2
Now, open your domain in browser and it will show wordpress installation screen.
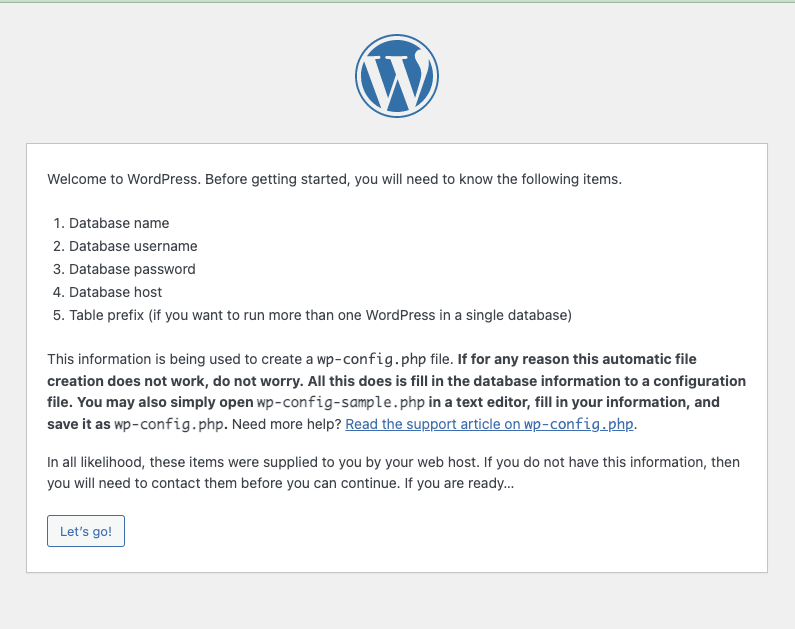
After entering all database details that we created in previous steps, it will attempt to create wp-config.php file . If it fails, it will provide code that we can manually copy paste by creating wp-config.php file.
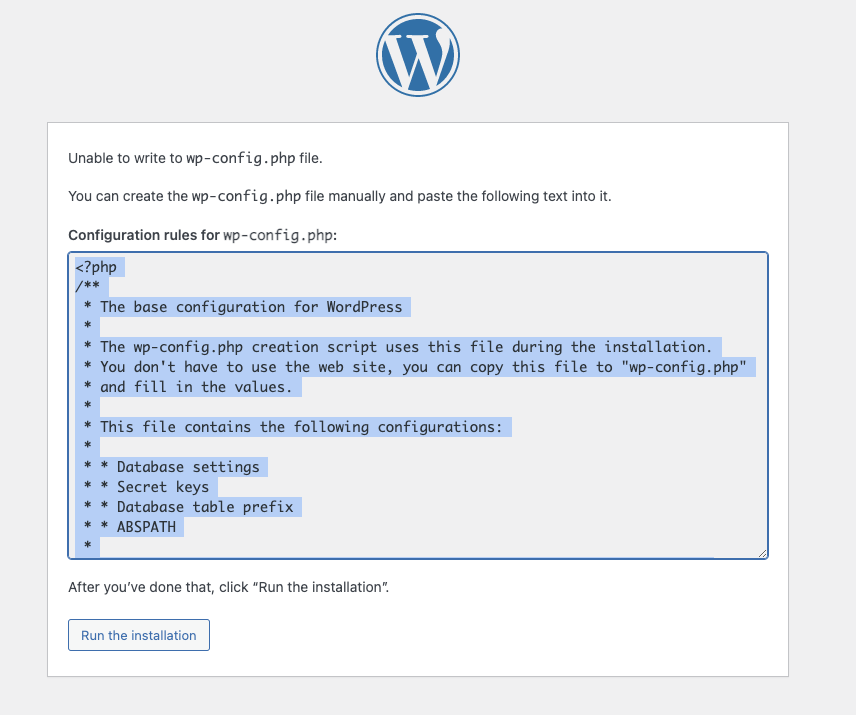
Run following command to create wp-config.php file. First navigate to public_html folder of that domain folder.
sudo vim wp-config.php
this will open an editor in command line, you can paste code from wordpress page here. Then press ESC key and type :wq and press ENTER. This will save and create that file. After that complete wordpress setup in your browser and configure website.
Run following command to encrypt free SSL certificates to secure our connection.
sudo apt install certbot python3-certbot-apache
sudo certbot -d DOMAIN-NAME
Run following commands to secure the files and folders.
find /var/www/DOMAIN-NAME/public_html -type d -exec chmod 755 {} \;
find /var/www/DOMAIN-NAME/public_html -type f -exec chmod 644 {} \;
Within the wp-config.php file, look for a line that says:
* That's all, stop editing! Happy blogging. */Add the below code just above it to enable updates and plugin installations.
define('FS_METHOD', 'direct');
Change the ownership of the wp-content directory to www-data to enable updates and plugin installation.
sudo chown -R www-data:www-data /var/www/DOMAIN-NAME/public_html/wp-content
And Done! Voila, your 1st wordpress website is ready 🙂 For setting up more websites similarly on same instance, repeat steps from Create a Virtual Host file for new Site. Have fun learning.
Leave a Reply
You must be logged in to post a comment.